
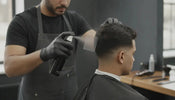
Spray on Hairline: Barber's Enhancement Guide
, by Buy Barber , 11 min reading time
, by Buy Barber , 11 min reading time
Learn how to spray on hairline enhancement products with a barber-ready workflow for prep, application, blending, cleanup, and client consultations.
When a client asks how to spray on hairline enhancement products, the goal is not to draw a perfectly straight, painted edge. The goal is to support the haircut with a controlled cosmetic finish that looks balanced from the front, sides, and normal conversation distance. Good results come from preparation, light product control, a hairline shape that respects the client's natural growth, and a thorough cleanup.
Shop Crisp Liquid Edge for professional hairline finishing
Spray-on hairline enhancement is a cosmetic barbering step used to increase the visual definition of a lineup, temple, or edge. Depending on the formula, the product may darken the appearance of sparse areas, help lay short hairs, or create a clearer working contrast before the barber refines the line with a clipper or razor. It can make the finished haircut look sharper, but it does not change hair growth or treat hair loss.
The phrase can describe more than one type of product. Some sprays contain fibers or pigments intended to create the appearance of fuller coverage. Other liquid line enhancers are used to prepare the skin and short hair for precise edging. A finishing or holding spray may be applied after the lineup to help keep a cosmetic result in place. These products may look similar on a shelf, but their timing and purpose are different.
For a barber, the most important question is simple: is the product meant to prepare the area for shaping, add temporary visual coverage, or set the finished look? Read the product label and build the workflow around that purpose.
A liquid line enhancer is used around the hairline, beard, goatee, or other detail area before shaping. Buybarber's Crisp Liquid Edge is presented as a professional line enhancer that can be spritzed onto the target area or applied from the palm. Its product instructions say to wait 3 to 5 seconds before shaping with a razor or clipper. That makes it a useful example of a prep-focused product, not a replacement for the barber's linework.
Hair fibers are cosmetic particles that cling to existing hair to create the appearance of greater density. They are a different tool from a liquid line enhancer and should not be treated as a hair-loss treatment. If the client's concern is coverage of a sparse area rather than edge preparation, review the technique in Buybarber's guide to hair building fibers. Do not use a fiber-focused application method when the product label calls for direct skin or edge preparation.
A finishing spray is intended to support the completed look. It may help hold fibers, short hairs, or a cosmetic enhancement in place, but the correct distance, amount, and drying time depend on the formula. It is not automatically interchangeable with a prep spray. For broader styling context, see the barber's guide to hair spray for men.
Add a professional line enhancer to your barber station
A controlled application starts before the bottle comes out. Preparation gives the product a cleaner surface and gives the barber a chance to agree on the intended result.
Look at the hairline from several angles and decide where the natural edge should remain. A useful rule is to preserve the client's existing proportions. Avoid lowering the line simply because a dark enhancement makes it possible. Use a light pencil or visual reference only if it is part of your normal, hygienic process, and keep the final shape consistent with the consultation.
Shake or prepare the product exactly as directed. Hold the bottle at the label's recommended distance and begin with a short, controlled pass. If the product is designed to be applied from the palm, dispense a small amount and place it only where needed. Do not flood the hairline. Overspray creates a wider cleanup area and makes blending harder.
Use the smallest amount that gives you a workable guide. Start at the area that needs the most definition, then feather toward the corners and temples. A light pass is easier to correct than a heavy one. Keep the shape slightly irregular where the natural hairline calls for it instead of creating a rigid, identical line across the forehead.
Give the formula the time stated on its label before you begin shaping. For Crisp Liquid Edge, Buybarber's product page gives a 3 to 5 second wait before using a razor or clipper. That timing is product-specific, so do not assume every spray should sit for the same length of time. If the product remains wet or starts to run, pause and reassess rather than adding more.
Use the clipper or razor technique appropriate for the service. Let the enhancement serve as a visual guide while you refine the edge. Keep the tool angle and pressure consistent, and do not use the cosmetic color to hide a line that is uneven, too low, or not supported by the client's natural growth. The haircut and the enhancement should work together.
After the primary edge is established, soften the transition at the corners, temples, and any area where product meets unenhanced hair. A clean card or small detail tool can help keep the boundary controlled, but avoid a hard stencil effect. Step back from the chair and check the result under normal shop lighting. If the front looks darker than the sides, use a clean tool or the product's approved removal method to reduce the excess before proceeding.
Remove stray product from the forehead, ears, neck, and surrounding skin with a clean, appropriate wipe or the method listed on the label. Do not scrub aggressively, especially after razor work. Once the area is clean, inspect the edge from the front and both profiles. If a hold or finishing product is part of the service, apply it only after the enhancement is blended and only as directed.
Natural-looking enhancement is mostly about restraint. The best application supports the haircut without becoming the first thing someone notices.
Enhancement products are part of the client experience, not a shortcut around communication. Describe the product as a temporary cosmetic finish. Avoid promising that it will regrow hair, repair a receding hairline, or permanently fill a sparse area. If the client raises a medical concern about sudden shedding, scalp irritation, or hair loss, keep the conversation within your role and suggest that they speak with a qualified healthcare professional.
Use clean tools and follow the product's directions for external use, ventilation, storage, and removal. Keep aerosol or pump spray away from the eyes and mucous membranes, and stop if the client reports burning, itching, or discomfort. Do not spray over open cuts, active irritation, or freshly abraded skin. The exact safety directions on the container take priority over a general barbering workflow.
It is also good practice to explain how the look will change after washing and what the client should expect between appointments. A clear explanation prevents the client from mistaking a temporary cosmetic effect for a permanent change and helps them decide whether the service suits their routine.
View Crisp Liquid Edge and refine your hairline finishing workflow
It may be a cosmetic line enhancer, hair fiber spray, pigment-based cover product, or finishing spray. The name and formula vary, so check the label and identify whether the product is meant for prep, visual coverage, or hold. The product should create a temporary appearance change, not promise hair growth.
It depends on the product. A prep-focused liquid line enhancer is generally used before shaping, while a finishing spray may be used after the edge is complete. Follow the specific product directions. For Crisp Liquid Edge, Buybarber's product page instructs the user to apply it, wait 3 to 5 seconds, and then shape with a razor or clipper.
Duration depends on the formula, the client's hair and skin, washing, sweat, weather, and how much friction the area receives. Give the client the product's stated expectations rather than guaranteeing an exact number of hours or days. Explain that the effect is cosmetic and will need to be refreshed as it wears away or is washed out.
No. A cosmetic spray may make an edge or sparse area look more defined for a limited time, but it does not reverse recession or stimulate growth. Consult with the client about the look they want, keep the application conservative, and recommend professional medical guidance for questions about hair loss or scalp health.
Use the removal method stated on the product label and a clean, gentle tool or wipe appropriate for the area. Avoid aggressive rubbing after edging. If the skin becomes irritated, stop the service and follow the product's safety guidance rather than trying to cover the irritation with more product.
To spray on hairline enhancement products well, prepare the area, confirm the client's desired finish, apply in controlled passes, wait for the formula to activate, refine the natural line, and clean the surrounding skin. The strongest results look intentional but not painted on. Treat the product as one part of a precise barbering service, and keep every cosmetic claim as measured as the application itself.


